


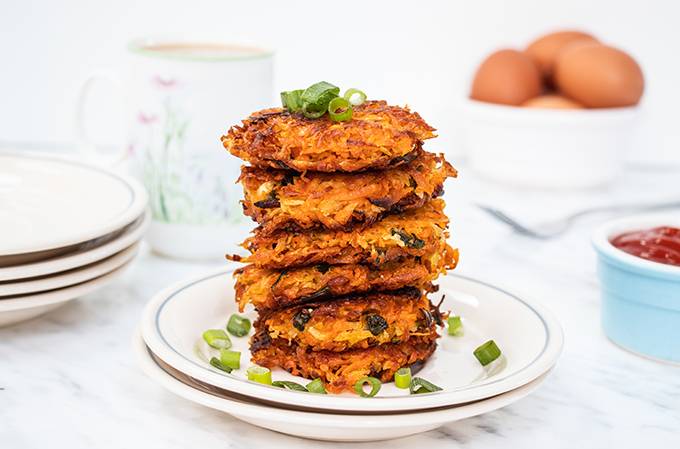
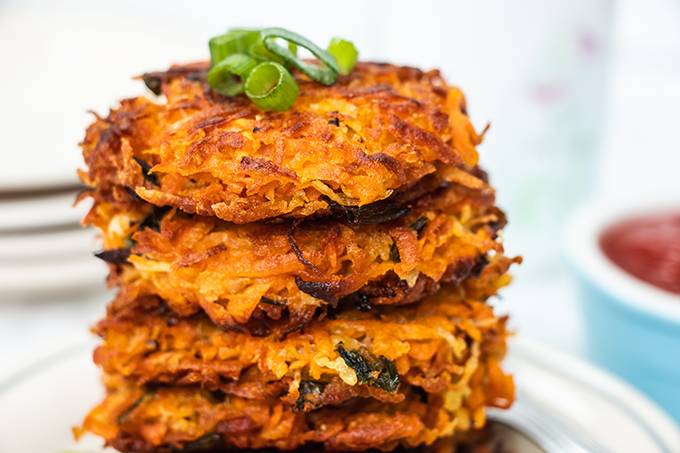
The quest for seriously crispy sweet potato hash browns was definitely a challenge! Baking, frying, egg, no egg – many experiments were had. Ultimately, sweet potatoes don’t crisp up in quite the same way that standard white potatoes do. To create a hash brown (of the orange variety!) that is still wonderfully crunchy all the way through, using a mixture of both sweet potato AND white potato works perfectly. The amazing flavour of sweet potato will still shine through, but there’ll be no soggyness in sight!
This delicious breakfast recipe is naturally gluten-free and dairy-free.
How to get the moisture out of the potato
Another essential part of achieving the ultimate crunch is ensuring as much moisture as possible is removed from your grated potato (both varieties!). To do this, take a handful at a time of the gratings and squeeze it firmly over a bowl or the sink. You can also wrap grated potato tightly in a thin towel to squeeze out the liquid.
Shaping the sweet potato hash browns
Because the potato mixture doesn’t naturally stick together very well, it can be tricky to form perfectly rounded hash browns. To help with this, I use a small ramekin. The ramekin is greased and the hash brown mixture is pushed inside evenly until filled about half way, before being gently tipped upside down over the pan for frying. The edges can then be neatened up by pushing back any escaping wispy bits with the back of a spoon.
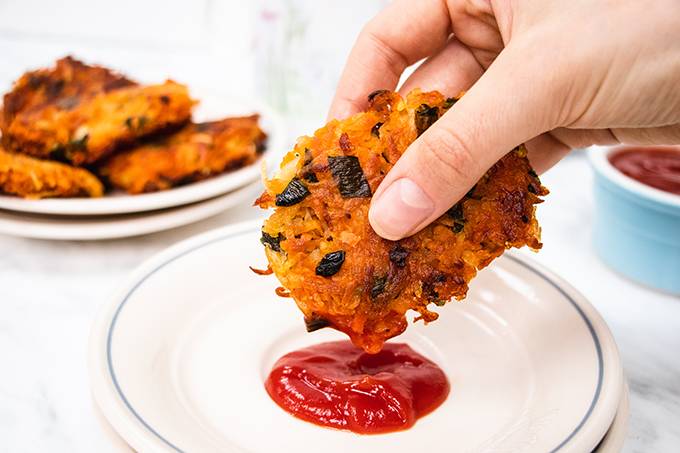
I hope you enjoy these tasty breakfast bites! They’re of course delicious with a generous dollop of ketchup, but why not try serving them with:
- Poached eggs
- Fried mushrooms
- Grilled bacon
- Baked beans
- Fresh salad
- Smashed avocado
If you give these a go, we’d love to hear how you got on in the comments below. You can also tag us in photos of your creations on Instagram @BlueSkyEating. Enjoy 🙂

Crispy Sweet Potato Hash Browns
Ingredients
- 1 large sweet potato
- 1 large white baking potato
- 1 bunch spring onions
- 1 tbsp olive oil + extra for frying
- 1 large egg
- 1/2 tsp salt
- Black pepper (to taste)
Instructions
- In a bowl, beat the egg. Add the olive oil, salt and pepper and mix.
- Slice up the green tops of the spring onions and add to the bowl.
- Peel and grate the sweet potato. Over the sink or another bowl, squeeze as much of the moisture as possible out of the sweet potato, a handful at a time. Add the gratings to egg mixture.
- Peel and grate the white potato (leaving this step until last will prevent the potato from going brown). Again, squeeze out the moisture before adding to the bowl with the remaining ingredients.
- Mix everything together thoroughly.
- Add a generous layer of olive oil to a large frying pan over a medium heat. There should be enough to cover the entire surface of the pan.
- Grease a small ramekin (I used one that measures approx 7cm across and 4cm high) and evenly push a handful of the mixture inside, filling it about halfway.
- Carefully tip the ramekin upside down so the mixture falls into the pan. You may need to reshape the edges of the hash brown a little using a small spoon or spatula.
- Repeat with the remaining mixture.
- Fry each hash brown for about 5 minutes on each side. If they start to become too browned too quickly, or the oil starts to spit too much, lower the heat a little.
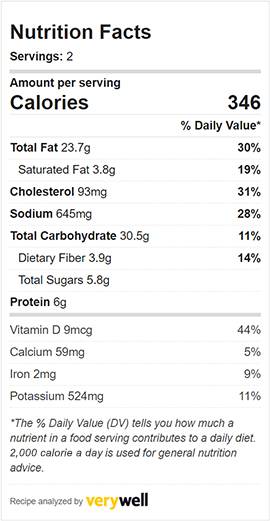
Please note that nutritional information is based on estimated quantities and therefore not always 100% accurate.

Leave a Reply